

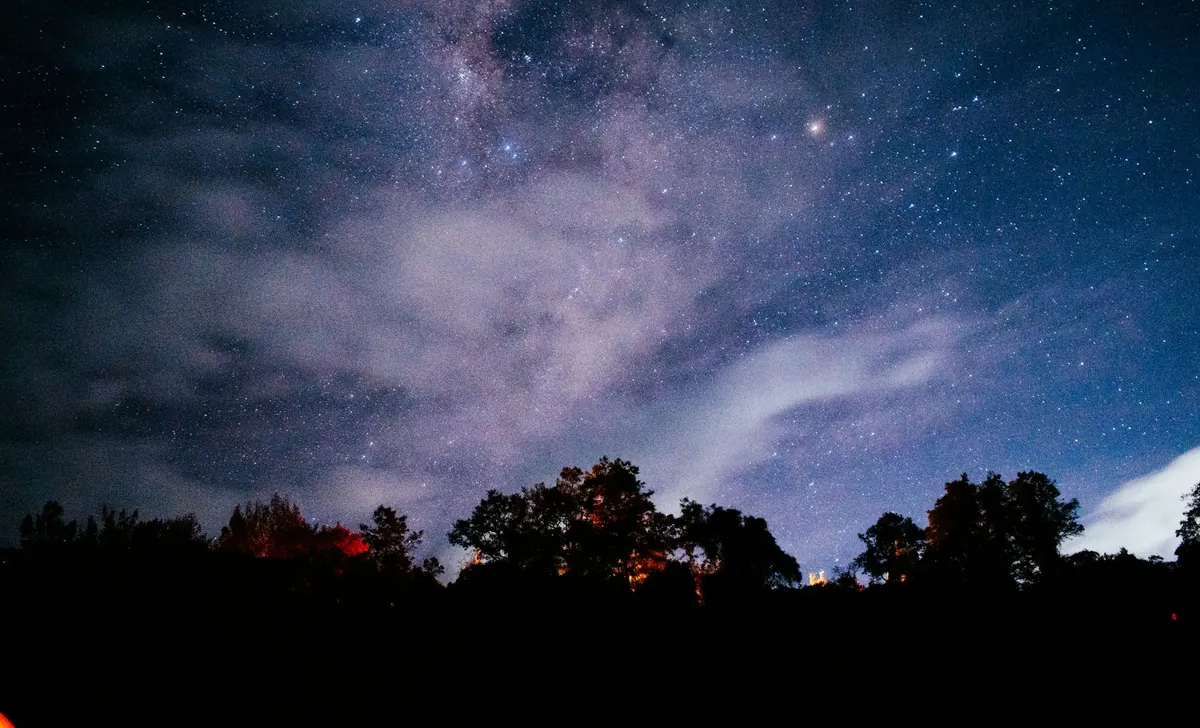
There comes a point on a clear, moonless night, usually about twenty minutes after you have given up on your eyes adjusting, when the sky stops being a scatter of dots and a faint pale band appears overhead. That is the Milky Way, and photographing it from Britain is harder than from the Atacama Desert but far easier than most people assume. The bright core of our galaxy sits low over the southern horizon here, and the weather will ruin plenty of attempts. Get the timing, the location and four or five camera settings right, though, and you can come home with a file worth printing.
Time it around the Moon, not just the season
The most common reason a first attempt fails has nothing to do with the camera. It is the Moon. Even a half moon will wash out the dust lanes that make the Milky Way interesting, so plan around the lunar cycle rather than fighting it. The days either side of new moon are the ones that matter, and if you can only go out at a weekend, book the nearest suitable date in advance and hope the cloud plays along.
In the UK the galactic core is above the horizon for part of the night from roughly February to November, but it never climbs high. From southern England the bright centre of the galaxy peaks only around ten degrees above the southern horizon, and from northern Scotland it barely clears the trees. That single fact shapes everything else: you need a low, open view to the south.
Late spring and early autumn are the most rewarding windows, because the core is up during the hours of genuine darkness. Midsummer is the hardest time in the northern half of Britain, where true astronomical darkness disappears altogether around the solstice and the sky stays stubbornly blue. In spring and autumn, the small hours after midnight are usually best.
Find somewhere genuinely dark
Light pollution is the quiet killer. You do not need a certified dark sky site, but a rural sky with a few distant glow domes will beat a town sky every time. Check a light pollution map, look for the greener and bluer zones within an hour or two of home, and remember that the direction you face matters as much as the site itself. A south-facing layby on a hill with nothing but fields between you and the horizon can outperform a famous dark sky car park hemmed in by conifers.
Britain has a good number of protected dark sky places, and most welcome careful visitors:
- Galloway Forest Park in Dumfries and Galloway, the UK's first Dark Sky Park
- Kielder Water and Forest Park in Northumberland
- Exmoor National Park in Somerset and Devon
- Bannau Brycheiniog, formerly the Brecon Beacons, and Eryri, formerly Snowdonia
- The North York Moors, the Yorkshire Dales and the South Downs
Wherever you go, tell someone your plans, take a companion if you can, and carry a torch with a red filter so you can check settings without destroying your night vision. Take more layers than you think you need. A clear night in a valley in April is a genuinely cold place to stand still for three hours.
The kit that actually matters
You do not need an astro-modified camera or a tracking mount to start. What you need is a camera you can set manually, a wide lens that opens up, and a tripod you trust.
- A camera with manual mode, RAW shooting and bulb or long-exposure timing
- A wide, fast lens: 14–24mm on full frame at f/2.8 or faster is ideal; a kit 18–55mm f/3.5–5.6 will work with compromise
- A sturdy tripod. This is the cheapest item that can ruin your entire night
- A remote release, or the camera's two-second self-timer to avoid shake
- Two or three spare batteries, because cold drains them quickly
- A red head torch, a flask and gloves
Settings to start from
Set the mode dial to manual and switch to RAW. Then work through this sequence, which will get you in the right region on almost any camera:
- Aperture: open it fully. If the corners of your stars look stretched or soft, stop down by a third of a stop.
- ISO: start at 3200 and go to 6400 if the frame is too dark. Noise is fixable; a black frame is not.
- Shutter speed: begin at 15 seconds on a 20mm lens. The old "500 rule" suggests around 25 seconds, but modern sensors record trailing sooner than that. If stars look like tiny dashes rather than points when you zoom in, shorten the exposure.
- Focus: switch to manual, turn on live view, magnify a bright star to maximum and adjust until it is the smallest point you can manage. Autofocus will not find it. Tape the focus ring if it drifts.
- White balance: set around 4000K, or leave it on daylight and correct afterwards.
Composition is where these images are won or lost. A bank of stars on its own is pleasant but anonymous. Put something in the bottom of the frame: a lone tree, a standing stone, a bothy, a stretch of coastline, the curve of a road. Aim so the core sits above your foreground rather than in the middle of the sky, check the histogram and make sure the peak is not jammed against the left edge. If you want a pin-sharp foreground as well, refocus at f/8 for one extra frame and blend the two later.
Editing without going overboard
A RAW file of the night sky always looks disappointing straight out of the camera: flat, brownish and dull. That is normal, and a few gentle adjustments will bring it back. Open the file in whatever editor you use, then:
- Raise the exposure slightly and lift the shadows, but leave the sky darker than instinct suggests
- Add contrast, then a shallow S-curve to deepen the gaps between the dust lanes
- Cool the white balance if the sky looks orange rather than blue-black
- Apply noise reduction carefully. Too much and individual stars smear into grey blobs
- Lift the black point very slightly so the darkest pixels are not pure noise
The temptation is to push saturation until the sky turns purple and the stars glow. Resist it. A restrained edit that keeps the sky dark and the horizon believable will look far better on a wall.
Your first night, step by step
Pick a night within a few days of new moon, check a cloud forecast, and choose your location in daylight so you are not hunting for a layby in the dark. Arrive before sunset, set the tripod up, find your foreground and wait for the sky. Give your eyes twenty minutes without white light. Take a test frame at 6400 ISO, 15 seconds and f/2.8, check it, then refine and shoot several frames of each composition so you have a choice later.
Then accept that the British weather will probably make you do this two or three times before it works. That is part of the process rather than a failure. The night you finally stand somewhere quiet with a clear southern horizon and a dark sky overhead, the wait will feel entirely reasonable.
Photo: Juan Martin Gomez / Pexels